Gimp Tutorial: Cyanotype effect
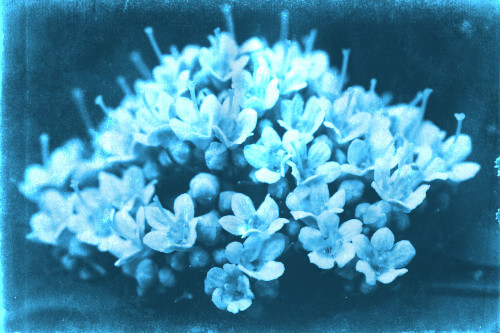
How to use Gimp to simulate the blueprint effect. In this tutorial we will recreate an old printing process that gave cyan-blue prints with Gimp.

In this Gimp tutorial we will recreate the Cyanotype (also known as blueprint). It was one of the first printing processes that were massively used. That process were low cost and simple, so it were used for produce large scale copies. The chemical products used for cyanotype printing had blue tones, so it were also called blueprint. Using Gimp for cyanotype effect simulation is quite easy, let's see how to proceed:
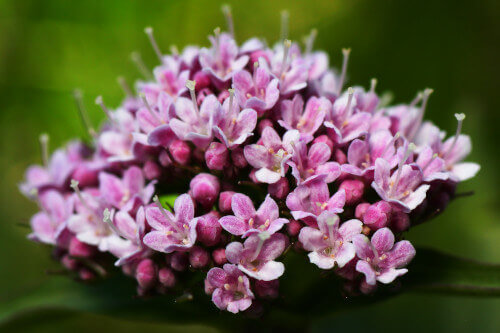
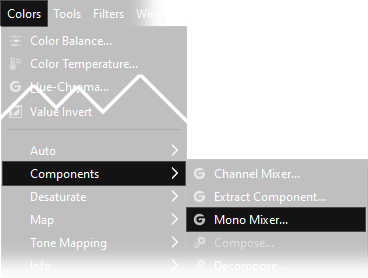
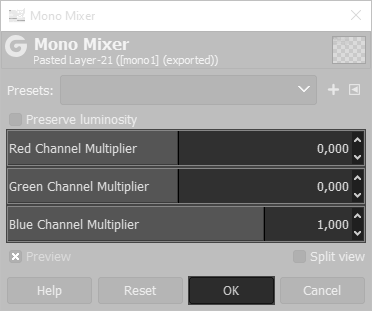
Choose the right photo, but remember that not all of your pictures will look nice in cyan tones, then open it. Now you have to convert it in black and white with Mono Mixer. Open Colors → components → Mono Mixer and set all parameters as below, then press Ok. The result must be a black and white photo.
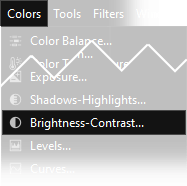
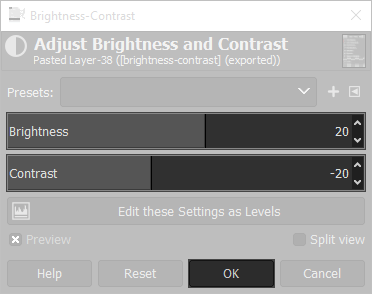
Now we need to brighten and reduce contrast: open Colors → Brightness-Contrast then increase Brightness to +20, and reduce Contrast to -20. We need to simulate the low contrast of the old prints.
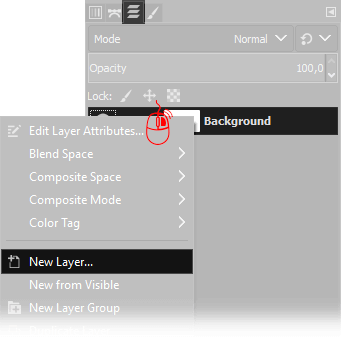
Next step is to create a new blank layer: place your cursor on the Layer window, (press Ctrl+L if you can't find it) then click Right Mouse button and choose New Layer. Default settings are perfect, so simply press Ok when you have to choose the new layer properties.
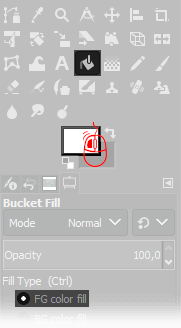
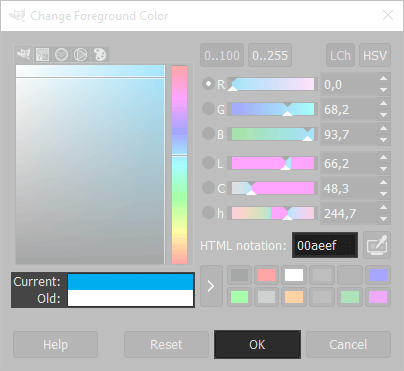
Select the Bucket Fill Tool, then click on the active foreground color to change it, and set 00aeef in the HTML notation, press Ok and click anywhere in the image to fill the New Layer with a plane cyano color.
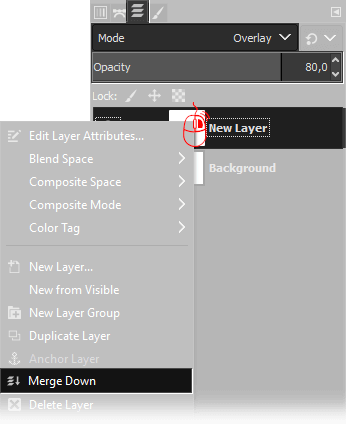
Now we need to merge down the layer on the top: on the layers window select the upper layer, then choose Overlay as Blend mode, and set opacity to 80%, then click with the right mouse button on the layer on the top and choose Merge down.
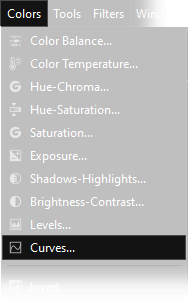
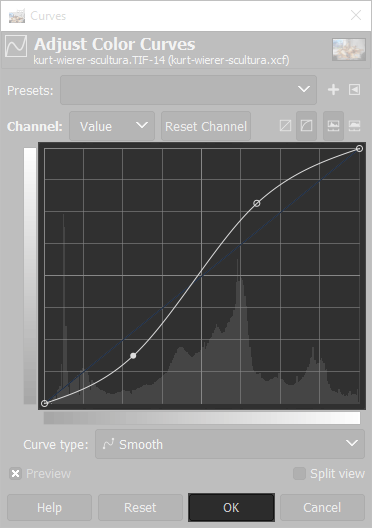
At this point we need to increase the contrast using Gimp's curves tool. Open Colors → Curves and set a curve similar to the next one. You should increase contrast, take inspiration from the following one but feel free to change the curve as you prefer.
Last step is optional, but will give a better looking to your cyanotype effect. You should apply an aged texture: click here to download the texture I used. This aged texture has 24 megapixels, that should be more than enough for any photo you want to edit. Open the aged texture, scale it into the size you need (Image → Scale Image), then copy it (Ctrl+C or Edit → Copy).
Come back to your cyanotype and paste the old paper texture (Edit → Past as → New Layer), then choose Divide as blend mode, opacity 100%, then Right mouse click on the Pasted Layer Merge Down.


If you liked this tutorial here you can find all the tutorials we wrote about editing with Gimp, or you can all the guides we have written about photography in general. If you liked our work, you could consider to ❤support us: by clicking here you can see how.