Gimp tutorial: rotate colors
Tutorial on the Gimp Color Wheel, which allows you to replace a certain range of colors with a different one.

The color wheel tool of Gimp, if used with the correct image, can do miracles. The purpose of this tool is to transform a certain range of colors into another, obviously chosen by us. The reason why it is called rotate colors, and is also known as color wheel is because it looks like a wheel that has to be rotated in order to change the colors. It will be enough to set a source range and a destination range and all the color tones corresponding will be changed. Long story short: this is one of those cases where practice is worth more than explanations. So let's see what the Color wheel of Gimp is used for, and how it works with an example.
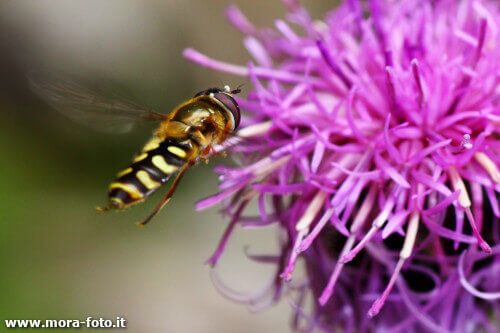
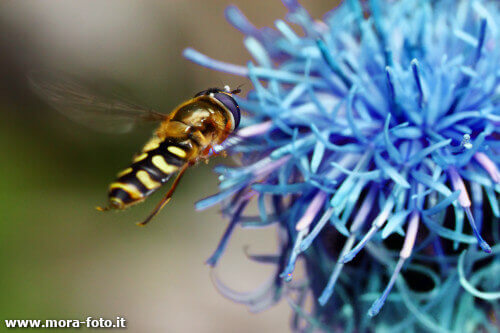
As we can see, we have replaced a certain range of colors with a different one, in the pictures above we can see how a purple flower has turned blue. So let's see how to proceed: first of all let's open Colors → Map → Rotate Colors.
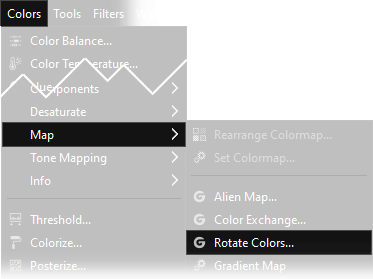
A window like this will appear. At the top we have to set the color range we want to replace, at the bottom the target range: the colors with we want to replace the colours chosen above. After the image, we will go to explain better.
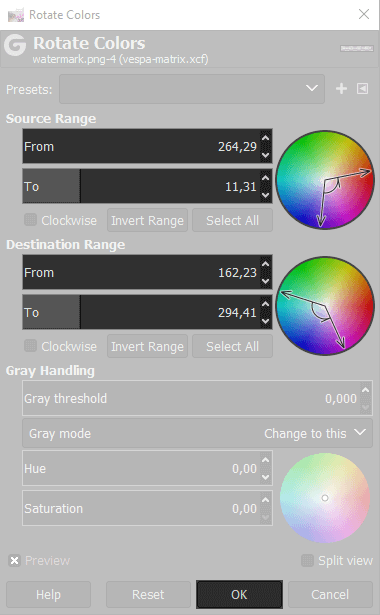
A couple of important things before proceeding: normally the radius of the wheel is ninety degrees, but you can widen or tighten it
by clicking and holding the left mouse button over the arrows, moving them to the desired position.
To rotate the entire color selection, you will always have to click and move the Left button of the
mouse, but inside "the radius".
If you prefer, you can use the sliders on the left, it's the exact same thing.
As always I recommend to proceed messing up with Gimp to do some testing, direct experience is much better than what you can learn in any tutorial.
Choose a photograph with really defined colors. As we have seen, we have a purple flower on a green background. Remember that not all pictures are suitable for this tutorial: make a blonde girl's hair turn red, with a yellow cornfield in the background, becomes impossible without an accurate selection mask, that separates the hair from the background, which has the same color shades.
The Source range is the starting color, the one that will be changed. In my case I selected all the purple tones. Imagine the arrows like clock hands. All shades of color within the "hands" are taken into account. Try on Gimp with your photo, the preview is in real time. We have a flower that has a wide range of shades of purple, so we have widened the range a little.

The Destination range is the target color, the one with which the range selected before will be changed.

As you can see we have rotated the selection range above the blue tones, in fact the flower has become blue and azure.


Below you can see a couple more examples, useful to better understand the results that can be obtained. The first example is the following, where we changed the colors of the livery of a rc model aircraft of a friend of us.


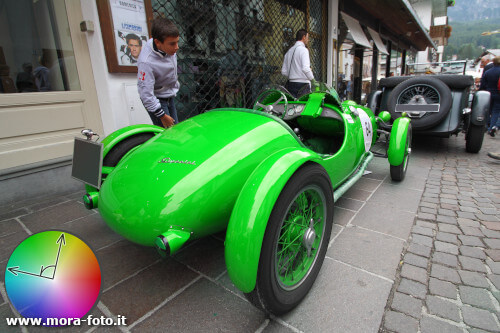
In this second example it would have been necessary to use a mask, to preserve the colors of the background and skin of people, partly similar to those of the body shop. However, we preferred to use the photo blending technique, to preserve the colors of the background as it is more comfortable than a mask.

If you liked this tutorial the tutorials we have written for improving your photographs with Gimp, or you can all the guides we have written about photography. If you liked our work, you could consider to ❤support us: by clicking here you can see how.