Gimp tutorial: white Balance
Gimp tutorial for a perfect white balance, both automatic and manual. Use the right white balance is extremely important to get the correct colors on a photograph.

The white balance is the correction of the color dominants of the light source in a photograph. Gimp, allows us to balance the colors of an image automatically or manually. If you are interested in this topic, I invite you to also read our white balance tutorial in the photography section, because is more about the theory. This tutorial is more pratical.
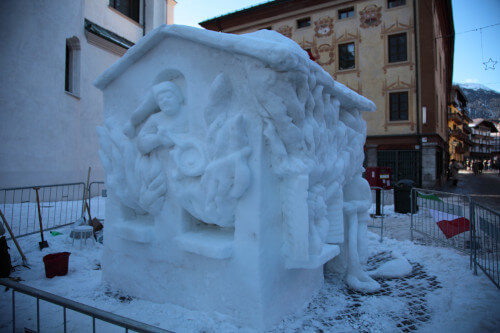
There are some rare cases we find ourselves taking a photograph in very particular light conditions, or we may have forgotten active a wrong white balance setting, compared to what we are photographing. If you shoot in RAW format this problem does not exist, as you can correct the white balance during the development of the raw file, but with a compressed photo, as jpg, you need to do some photo editing.

In the example picture, the balance was set to "Day", but the correct setting would have been "shadow". All tones have a strong blue dominant, as sunlight (with its characteristic yellow colour) does not directly illuminate the scene.
Gimp automatic white balance
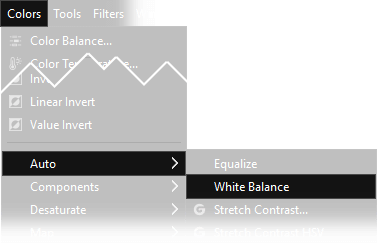
With the function Colors → Auto → White balance our beloved Gimp will automatically correct the colors according to a mathematical calculation, with a satisfactory result most of the times. In photo editing it is important to apply the automatico white balance first of everything else, because if you apply an automatic white balance after having already contrasted and saturated the photograph, the results will be worse. The auto white balance creates a strong increase in contrast, so if you have a photograph already strongly contrasted, or if you want to keep the shades softer, you'll have to do it manually.
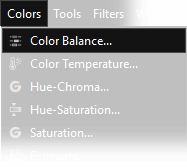
Once you have done an automatic white balance, the image should already look correct. In our case the result, which we'll see very soon, was still slightly too blue. To manually adjust a slight dominant color, we can use the less aggressive function Colors → Color Balance, where to reduce an excess of blue we increase its opposite color, which is yellow. The same reasoning applies to all the other colours that could be present. The selection of midtones, highlights or shadows allows us to work only on a certain range, e.g. we could remove the blue from the shadows or emphasize the red, but only on the highlights, on a sunset. Personally, I always recommend to start with half tones, then correct, only if necessary, also highlights and shadows.
Alternatively, if you want to work in the entire image, it might be very useful to use the tool Colors → Color temperature, where you'll find a slider to correct the image with the desired color temperature.
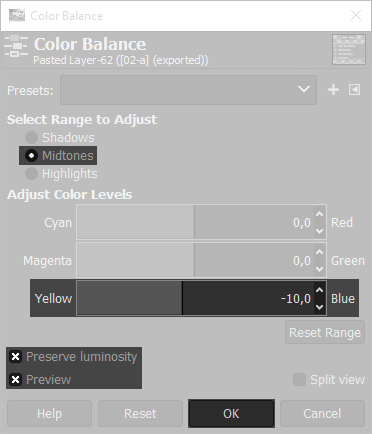
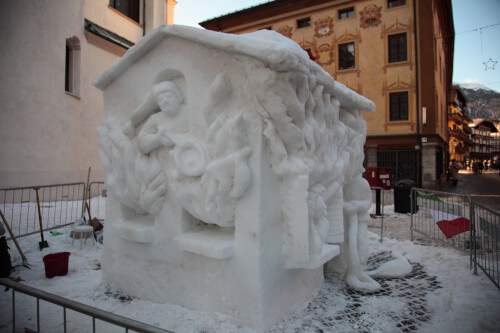
Remember that Gimp helps us to correct an error, but it would be better to shoot with the correct white balance. Over edit a file often results in a deterioration of the image as a whole. Below you can see the result before and after auto white balance with also the color correction.

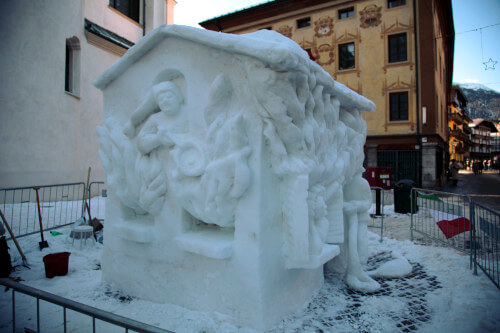
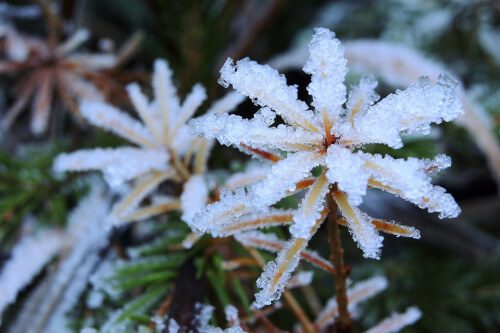
The Color Balance tool can also be used to colorize an image. Apply a +10 of blue to a photograph of ice in winter could improve the sensation of coldness, as a +10 of red could give to a sunset a tone that the camera could have missed. I suggest you to experiment with different solutions, and try to emphasize the dominant colors in some cases.

Gimp manual white balance with color levels
An alternative method that we can use to correctly adjust the White Balance is to use the colors levels, adjusting the histogram separately for the three color channels. Consider that this method is not infallible, but many times it allows us to find color dominants that risk going unnoticed.
To be able to do follow this tutorial you need to have a clear understanding of what the color histogram is, and how to use the Gimp color levels, if you have no experience with
it I invite you to read first our Gimp histogram and color levels tutorial.
.
In the example picture, it is almost impossible to see the correct white balance.
This is a photograph taken in the shade and exported with tungsten white balance, so with a strong blue dominant that is partially
hidden by the lack of references and purplish tones of the flower.
First we open the tool Color 🠞 Levels, then we select the color channel from the drop-down menu. For the moment
we'll just watch all three channels (red, green and blue).
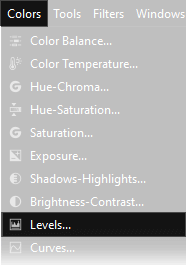
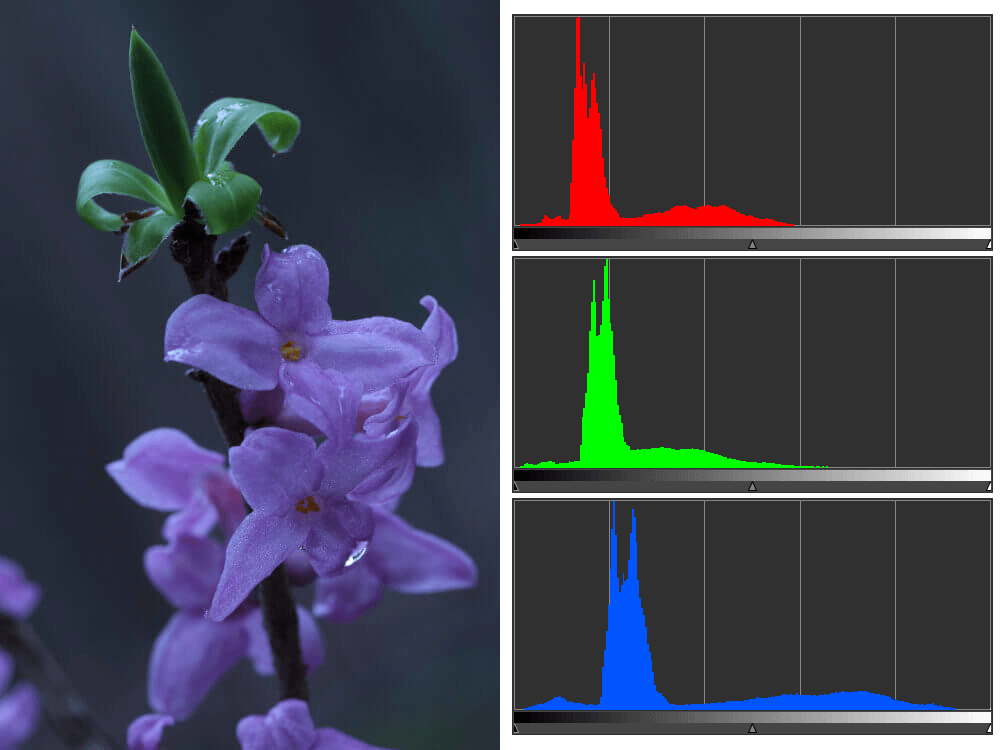
What we need to do is try to optimize each channel's histogram. Take the arrows below each histogram, these must be adjusted so that each chart is perfectly enclosed within them. Let's tighten them as in the example image. To do this, I recommend that you enlarge the work window as much as possible so that you have the best possible visibility. If small isolated lines appear, I suggest you to ignore them and cut them out till the histogram start to be continuous.
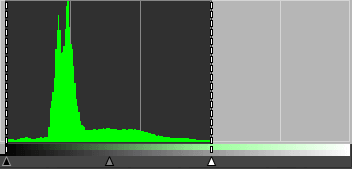
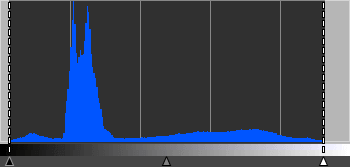
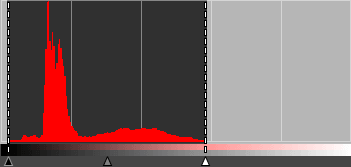
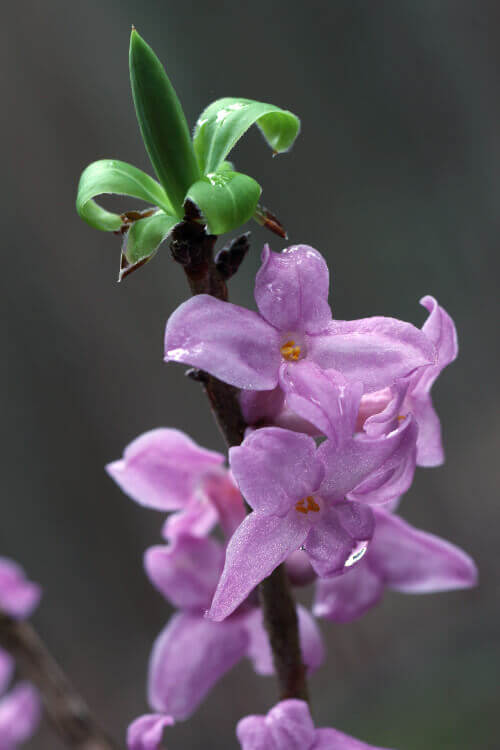
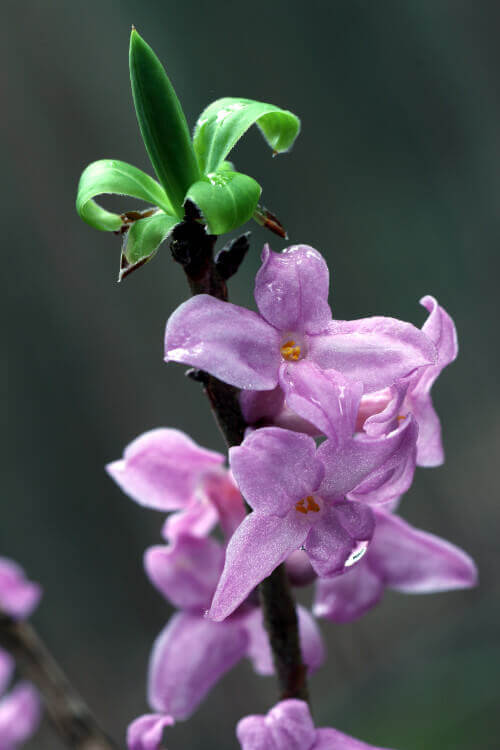
As mentioned earlier, this method is not infallible, but many times it allows you to have the vision of dominants who might go unnoticed. In the example image used before, there was a very present blue veil, which was completely eliminated by the correct histogram adjustment, as we can see below. On the left I published the photograph corrected with histograms, on the right is the one with Gimp's auto white balance.
If you liked this tutorial here you can find all the tutorials we wrote about editing with Gimp, or you can all the guides we have written about photography in general. If you liked our work, you could consider to ❤support us: by clicking here you can see how.